

Alloy wheels are the undeniable showcase of any car. Their shiny surface catches the eye and gives the vehicle an elegant look. However, they’re also the most exposed to dirt — brake dust, road salt, and mud can quickly dull their shine.
In this article, we’ll show you step by step how to take care of your alloy wheels so they look like new and retain their flawless appearance.
Table of contents
- Why is regular wheel cleaning so important?
- Impact of dirt on wheel appearance and durability
- How dirt and brake dust can damage wheels?
- Preparing wheels for cleaning
- What tools and products will you need?
- Safety during wheel cleaning
- Step 1: Rinse the wheels with water
- Step 2: Apply the cleaning product
- Step 3: Brushing and cleaning hard-to-reach areas
- Step 4: Rinse the wheels with clean water
- Step 5: Drying the wheels
- Step 6: Protecting the wheels with a protective coating
- Step 7: Inspecting the results and making any necessary touch-ups
- Summary
Why is regular wheel cleaning so important?
Alloy wheels require regular care not just for aesthetic reasons. Consistent cleaning helps extend their lifespan and contributes to your vehicle’s safety. Brake dust, road residues, mud, and winter road salt are just some of the elements constantly attacking the wheel surface.
Neglecting regular cleaning allows dirt to build up, making it increasingly difficult to remove over time. Moreover, it doesn’t just affect appearance — it can also accelerate corrosion and reduce the wheels’ longevity. Regular washing preserves their original shine, protects them from damage, and ensures your car always looks flawless, no matter the mileage.
Impact of dirt on wheel appearance and durability
Dirt, dust, and brake dust aren’t just an aesthetic concern. These seemingly minor contaminants can have a real impact on the condition of your wheels. Brake dust contains metallic particles that, when exposed to high temperatures and moisture, can embed into the aluminum surface, causing dulling, discoloration, and even stubborn stains.
Prolonged accumulation of dirt can lead to micro-damage on the surface, which over time may develop into visible defects. That’s why it’s crucial to prevent dirt from having the chance to “bond” with the wheel and cause permanent damage.
How dirt and brake dust can damage wheels?
Brake dust is a mixture of metallic particles generated by the friction of brake pads against the discs. These tiny particles, heated during braking, literally burn onto the wheel surface. Combined with moisture, they trigger chemical processes that can lead to corrosion.
The mechanical impact of brake dust is also significant. The metallic particles can cause microscopic scratches that become more visible over time. If dirt is allowed to sit on the wheels for an extended period, removal becomes much more difficult, and in extreme cases, impossible without professional intervention. That’s why prevention and regular cleaning with proper, dedicated products are key.
Preparing wheels for cleaning
Effective wheel cleaning isn’t just about good intentions — it requires proper preparation. Before you get started, make sure you have all the necessary tools and cleaning products at hand. A well-planned wash not only delivers better results but is also safer for both you and your wheels.
Setting up your workspace in a shaded area with access to water and the right accessories is essential. Remember, wheel cleaning takes a bit more time than a standard car wash, so it’s worth setting aside enough time to achieve a perfect result.
What tools and products will you need?
For professional alloy wheel cleaning, a few basic accessories come in handy. First, prepare brushes of different sizes — larger ones for the main wheel surfaces and smaller brushes for hard-to-reach spots between the spokes. Protective gloves are a must, along with sponges and buckets of clean water.
When it comes to chemical products, it’s best to rely on proven solutions:
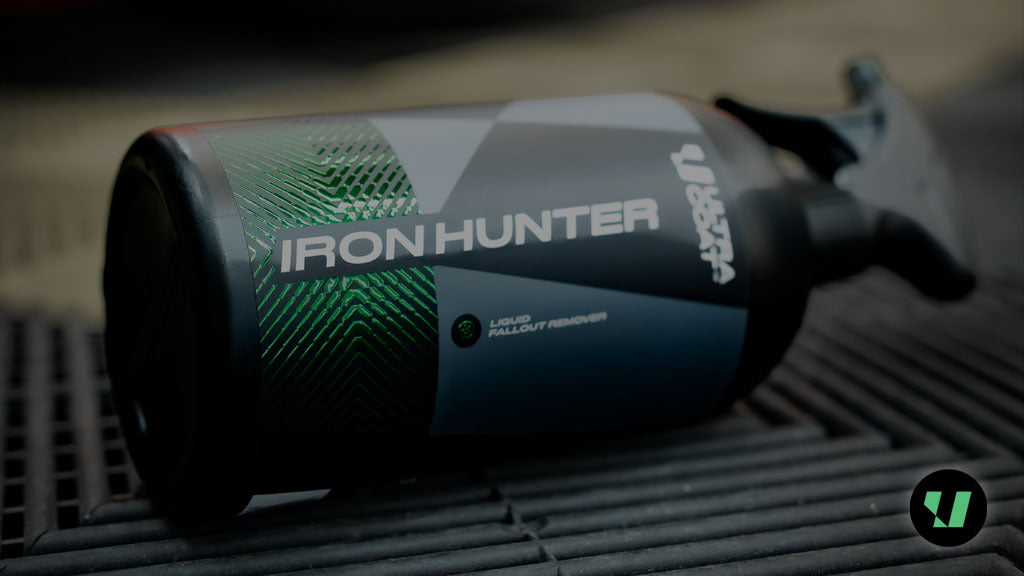
ULTRACOAT offers a range of products designed to meet the highest detailing standards. Iron+ is a gel ideal for removing stubborn metallic particles and heavy dirt, providing deep surface decontamination. Iron Hunter is perfect for chemical decontamination, effectively dissolving accumulated brake dust. For regular, everyday wheel and tire maintenance, Wheel Cleaner works excellently — it quickly and efficiently removes daily dirt while remaining completely safe for sensitive surfaces

Safety during wheel cleaning
Working with chemical cleaning products requires following basic safety rules. Always wear protective gloves to prevent skin contact with the products. If there’s a risk of splashing, protective goggles are also recommended.
Use products according to the manufacturer’s instructions — do not exceed the recommended dwell time and avoid mixing different chemicals. Work in a well-ventilated area, preferably outdoors. Pay close attention to ensure that cleaning agents do not come into contact with your eyes or mucous membranes. In case of contact, rinse the affected area immediately with plenty of water. Responsibility and precision are the foundation of effective detailing.
Now that you know how to prepare, let’s get to the core — the actual steps of cleaning:
Step 1: Rinse the wheels with water
Before applying any cleaning products, start by thoroughly rinsing the wheels with clean water. This seemingly simple step is crucial for the following stages of cleaning. Water at the right pressure removes loose dirt, dust, sand, and other contaminants that could scratch the surface during brushing.
The initial rinse is also the moment to assess the level of dirt on the wheels and prepare the surface for chemical products. This way, the cleaners act directly on stuck-on contaminants rather than a layer of loose dust. Rinse each wheel carefully, paying attention to all the nooks and crannies — the better you perform this step, the more effective the subsequent cleaning will be.
Step 2: Apply the cleaning product
Choosing the right product for alloy wheels:
There are various types of wheel cleaning products on the market, and selecting the right one depends on the level of dirt and your personal preferences.
Gel-based products – Iron+
Iron+ is a specialized gel designed to remove metallic particles, brake dust, and airborne rust. Thanks to its thick, gel-like consistency, the product adheres well to surfaces, even vertical ones, allowing it to work longer and thoroughly penetrate dirt. Its neutral pH makes Iron+ completely safe for:
- paint,
- wheels,
- chrome,
- rubber,
- glass,
… while also being safe for the user.
During application, the product produces a so-called “bleeding” effect — a characteristic reddish color that shows metallic particles and rust are being effectively dissolved. The action is fast and thorough, with results visible shortly after application. Iron+ leaves the surface completely free of metallic contaminants, and its pleasant scent makes the process comfortable to work with.

Liquid products – Iron Hunter
Iron Hunter is a ready-to-use liquid that effectively removes metallic particles and airborne rust. Its liquid yet slightly viscous consistency makes application on wheels easy, while slow evaporation allows for extended working time without rushing. The product reacts almost immediately, changing the color of the treated surface as a signal of effective action. Its neutral pH makes Iron Hunter safe for wheels, paint, and most protective coatings, including ceramic coatings.

How to use the product without damaging the paint?
The key to safe cleaning is proper application technique. Apply the product evenly, preferably using a sprayer or applicator, and avoid overloading any one area. Never let the product dry on the wheels — always work on a wet surface.
Do not exceed the recommended dwell time and avoid using the product on hot wheels. Always test a new product on a small, inconspicuous area to ensure it is suitable for your wheels.
Step 3: Brushing and cleaning hard-to-reach areas
After allowing the product time to work, it’s time for mechanical cleaning.
- Use a brush with the right stiffness — firm enough to effectively remove dirt, yet soft enough not to scratch the aluminum surface.
- Use a larger brush for the outer parts of the wheel, and smaller brushes for inner nooks and the spaces between spokes.
- When brushing, make gentle, circular motions, systematically covering the entire wheel surface.
- Pay special attention to hard-to-reach areas where brake dust tends to accumulate.
Products with a longer dwell time make this process much easier, as they effectively loosen contaminants, minimizing the need for vigorous scrubbing and ensuring excellent results with minimal effort.
Step 4: Rinse the wheels with clean water
After thoroughly brushing, it’s time for another crucial rinse.
- Use plenty of clean water to completely remove any remaining product and dissolved dirt.
- The rinsing should be thorough — any leftover cleaner can leave unsightly streaks and spots once dry.
- Pay special attention to hard-to-reach areas where product and dirt may have accumulated.
- Direct the water stream from different angles to ensure every nook and cranny is fully rinsed.
- Properly executing this rinsing step is essential for achieving perfectly clean wheels.
Step 5: Drying the wheels
Do you think the job is done after rinsing? Not quite. Drying the wheels is a step you shouldn’t skip. Leaving wheels to air dry can lead to water spots, especially if your area has hard water with high mineral content.
Use a clean microfiber cloth to gently dry the wheel surfaces. Microfiber absorbs water effectively without leaving fibers or streaks. Additionally, drying gives you a chance to inspect the wheels and ensure all dirt has been removed. If needed, you can go back and touch up specific areas. This step is crucial for achieving a flawless finish.
Step 6: Protecting the wheels with a protective coating
Clean wheels are only half the battle. To keep them looking pristine for longer, it’s worth applying a protective coating. A ceramic coating creates a barrier that makes it harder for dirt, brake dust, and other contaminants to stick. This makes future washes much quicker and easier. Apply the chosen product according to the manufacturer’s instructions, spreading it evenly across the wheel surface. After application, gently polish to achieve a uniform shine.
Why use a ceramic coating?
Protecting your wheels is an investment that quickly pays off. A ceramic coating not only gives wheels a beautiful, deep shine but, most importantly, shields them from external elements. By creating a hydrophobic layer, it causes water to bead off the surface, carrying away some dirt along with it.
With a protective coating, brake dust is less likely to embed into the aluminum surface. Future washes become simpler, faster, and less demanding. Moreover, regular use of a protective layer slows down corrosion and helps maintain the wheels’ original appearance for many years. It’s a small effort compared to the benefits it provides.

Step 7: Inspecting the results and making any necessary touch-ups
The final step is a thorough inspection of your work. In good lighting, preferably natural daylight, examine each wheel up close. Check that all areas are evenly clean and that no streaks, spots, or overlooked dirt remain.
If you notice any imperfections, don’t worry — simply return to the appropriate step. You may only need to reapply the product locally, brush again, then rinse and dry. Only when you are completely satisfied with the results can you consider the job done. Clean, shiny wheels are the reward for your effort.
Summary
Cleaning alloy wheels doesn’t have to be time-consuming or complicated if you use the right tools and products. The key is to clean regularly, use pH-neutral cleaners, and remember to protect the surface after each wash. This way, you’ll avoid etching, discoloration, and loss of shine, keeping your wheels looking like new for years.
The products mentioned in this article make daily maintenance easier, while a ceramic coating provides an effective protective barrier. Taking care of your wheels isn’t just about aesthetics — it’s also an investment in the durability and safety of your car.

Share:
Exterior car detailing in 9 steps
Hardness of ceramic coatings